Research goes sideways the moment you trust your browser to hold it. Thirty tabs open, three windows, a 'Saved' bookmarks folder that becomes a graveyard — and when you actually sit down to write, half your sources have expired sessions or you can't remember why you saved a particular page at all.
The fix is simple: capture each source the moment you find it, attach a topic tag so you know which section of your paper it belongs to, and put it somewhere you can actually see it. This guide covers exactly how to do that — manually if you want, or with a one-click tool that makes the whole process take three seconds per source.
Step 1 — Capture the Source the Moment You Find It
The single worst habit in research is deciding you'll 'come back to it later.' You won't — or if you do, the tab is gone. The rule that actually works: capture first, read later. The moment a page looks relevant, save it before you read more than the headline.
If you're doing this manually, here's a clean system that works without any extra tool:
- Copy the URL and paste it into a plain text file with the page title above it. One blank line between entries. Simple, portable, works anywhere.
- Use a browser bookmarks folder named for your paper (e.g., "Climate Essay"). The downside: bookmarks show no context, no notes, and no visual preview — just a title and a favicon.
- Keep a running Google Doc with pasted URLs and a one-line note about why each source matters. This is the most context-rich manual method, though it requires you to switch apps every time.
The common thread in all three manual methods: they require you to stop what you're doing, switch to another place, and type something. That friction is why researchers end up with 40 open tabs instead of 40 saved sources.
Step 2 — Tag Every Source by Topic Before You Move On
Tags are what turn a list of links into a usable outline. Without them, you end up rereading every source to figure out where it fits. With them, you can pull up everything tagged 'methodology' or 'counterargument' in seconds when you need it.
Here's how to build a tagging system that actually holds up across a long research session:
- Tag by paper section, not by source type. 'Introduction', 'Background', 'Evidence-for', 'Evidence-against', 'Conclusion' are more useful tags than 'article', 'journal', or 'website'. You already know it's a website — you need to know where it goes in the paper.
- Use one primary tag and one optional secondary tag. Trying to tag a source six different ways creates the same clutter you were trying to escape. One tag for section, one for subtopic if needed (e.g., 'Evidence-for' + 'economic-impact').
- Tag at capture time, not at writing time. When you're browsing, you know exactly what you were looking for when you found this page. That context evaporates. Tag it now.
- Keep your tag vocabulary short and consistent. If you sometimes write 'intro' and sometimes 'introduction', your search results will split. Pick one form and stick with it from the first source.
If you're using a text file or Google Doc manually, add the tag in brackets right below the URL: [Evidence-for] [economic-impact]. Simple, searchable with Ctrl+F, and it costs you four seconds per source.
Step 3 — Keep Your Sources Visible So Nothing Gets Buried
Linear lists — whether bookmarks, text files, or a long Google Doc — share one problem: everything below the fold is forgotten. If your 'Background' sources are twenty entries down, you'll mentally stop treating them as active research. Visual organization fixes this.
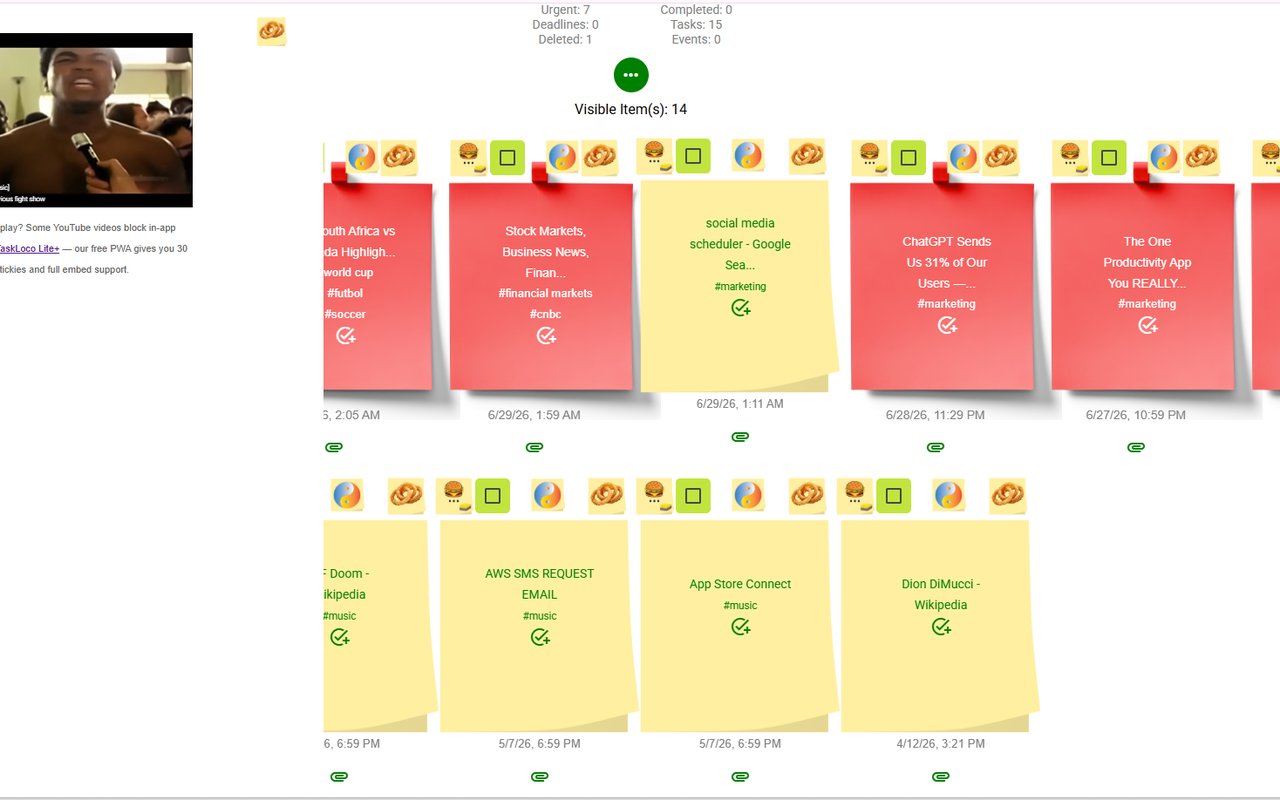
When you can see your sources as cards or notes arranged by topic, two things happen: you notice gaps ('I have nothing tagged Counterargument yet') and you stop re-Googling things you already found.
The practical options for visual organization without a dedicated tool:
- A spreadsheet with columns for URL, title, section tag, and a short note. Freeze the header row. Filter by the section column to see only what belongs to 'Methodology'. This works, and it's fast to scan — but you still have to copy-paste every URL manually.
- A digital whiteboard (Miro, FigJam, etc.). Drag sticky notes around, group by topic. Very visual, but creating one note per source takes far longer than capturing should.
- Browser bookmark folders with subfolders per section. Better than one big folder, but still no notes, no context, and no way to see all sources across sections at once.
None of these are bad. All of them require manual work per source. If you have twenty sources, that's fine. If you have sixty, the manual overhead starts to eat into actual writing time.
How the Sticky Note Web Clipper Makes This Three Seconds Per Source
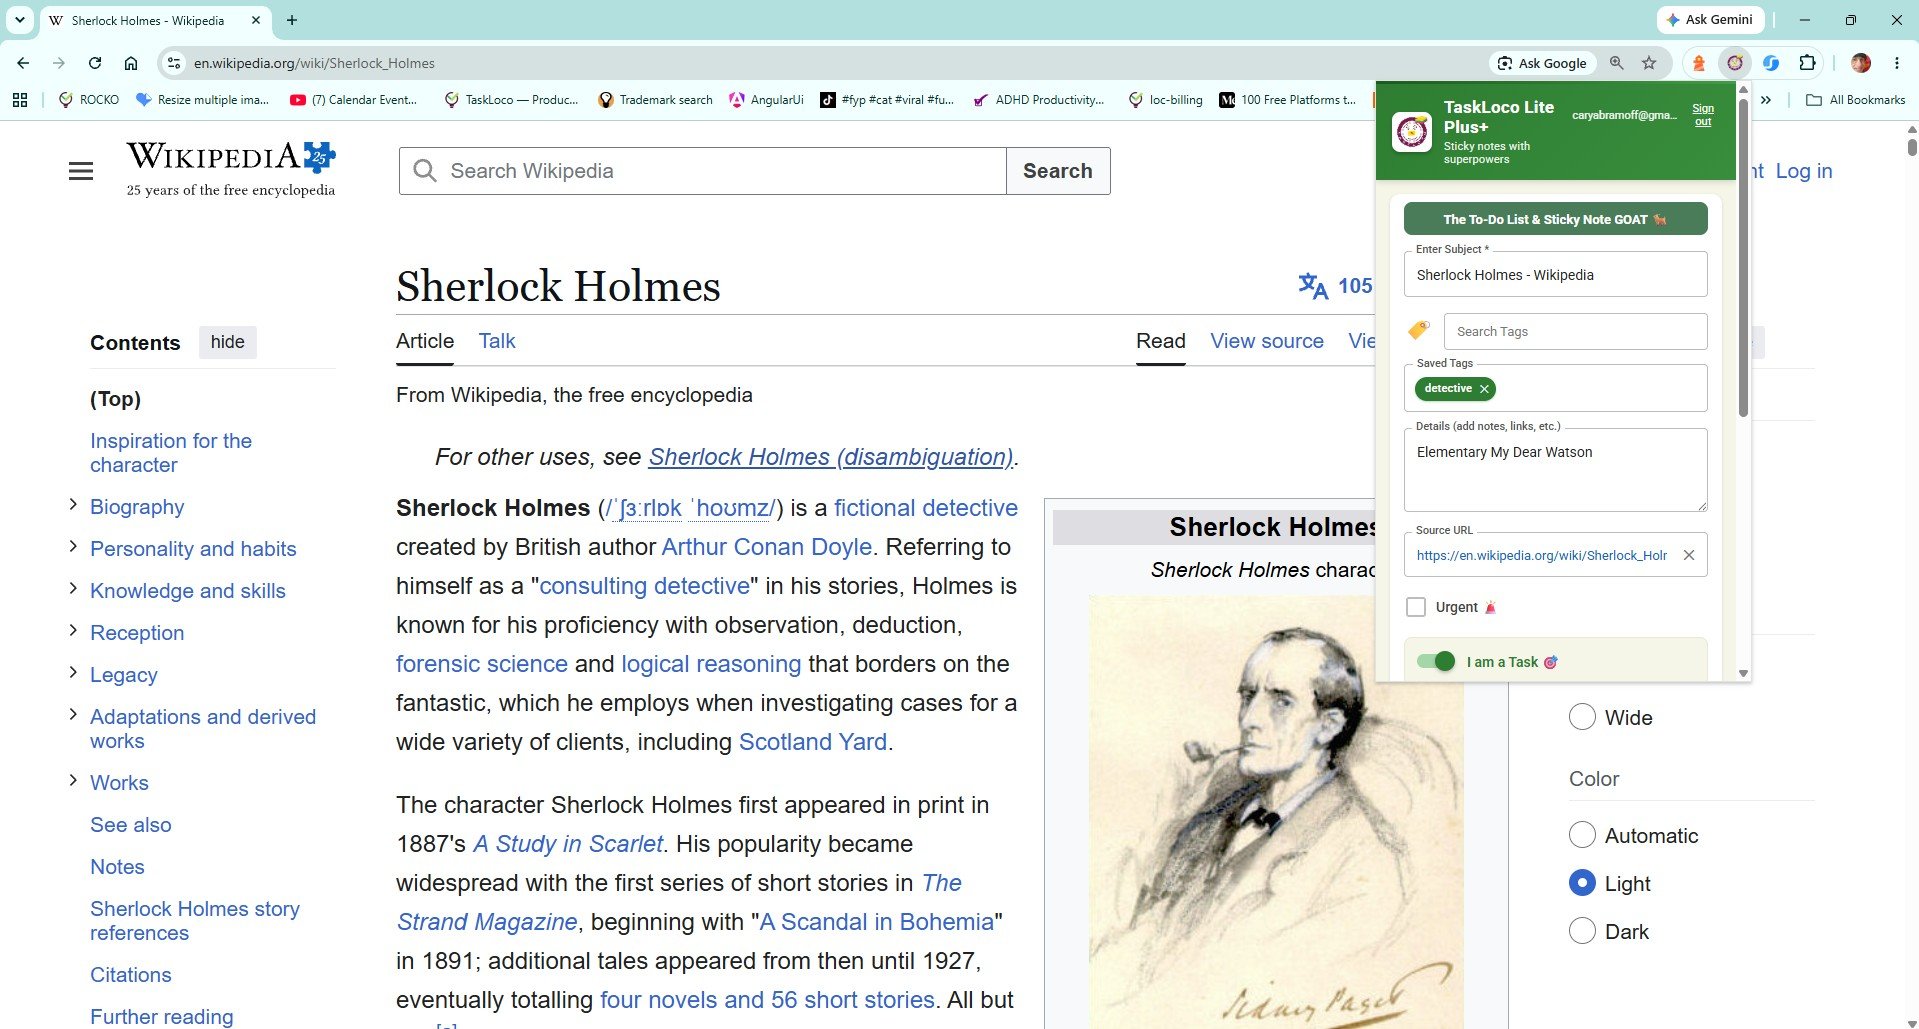
The Sticky Note Web Clipper is a free Chrome extension that turns any open tab into a saved sticky note in one click — title and URL auto-filled, no copy-paste required. For research, this means you never have to leave the page you're reading to save it.
Here's what the workflow looks like in practice:
- You land on a useful article. Click the toolbar icon. The note appears with the page title and URL already filled in.
- Add your topic tag — 'Background', 'Evidence-for', whatever your system uses. Takes three seconds.
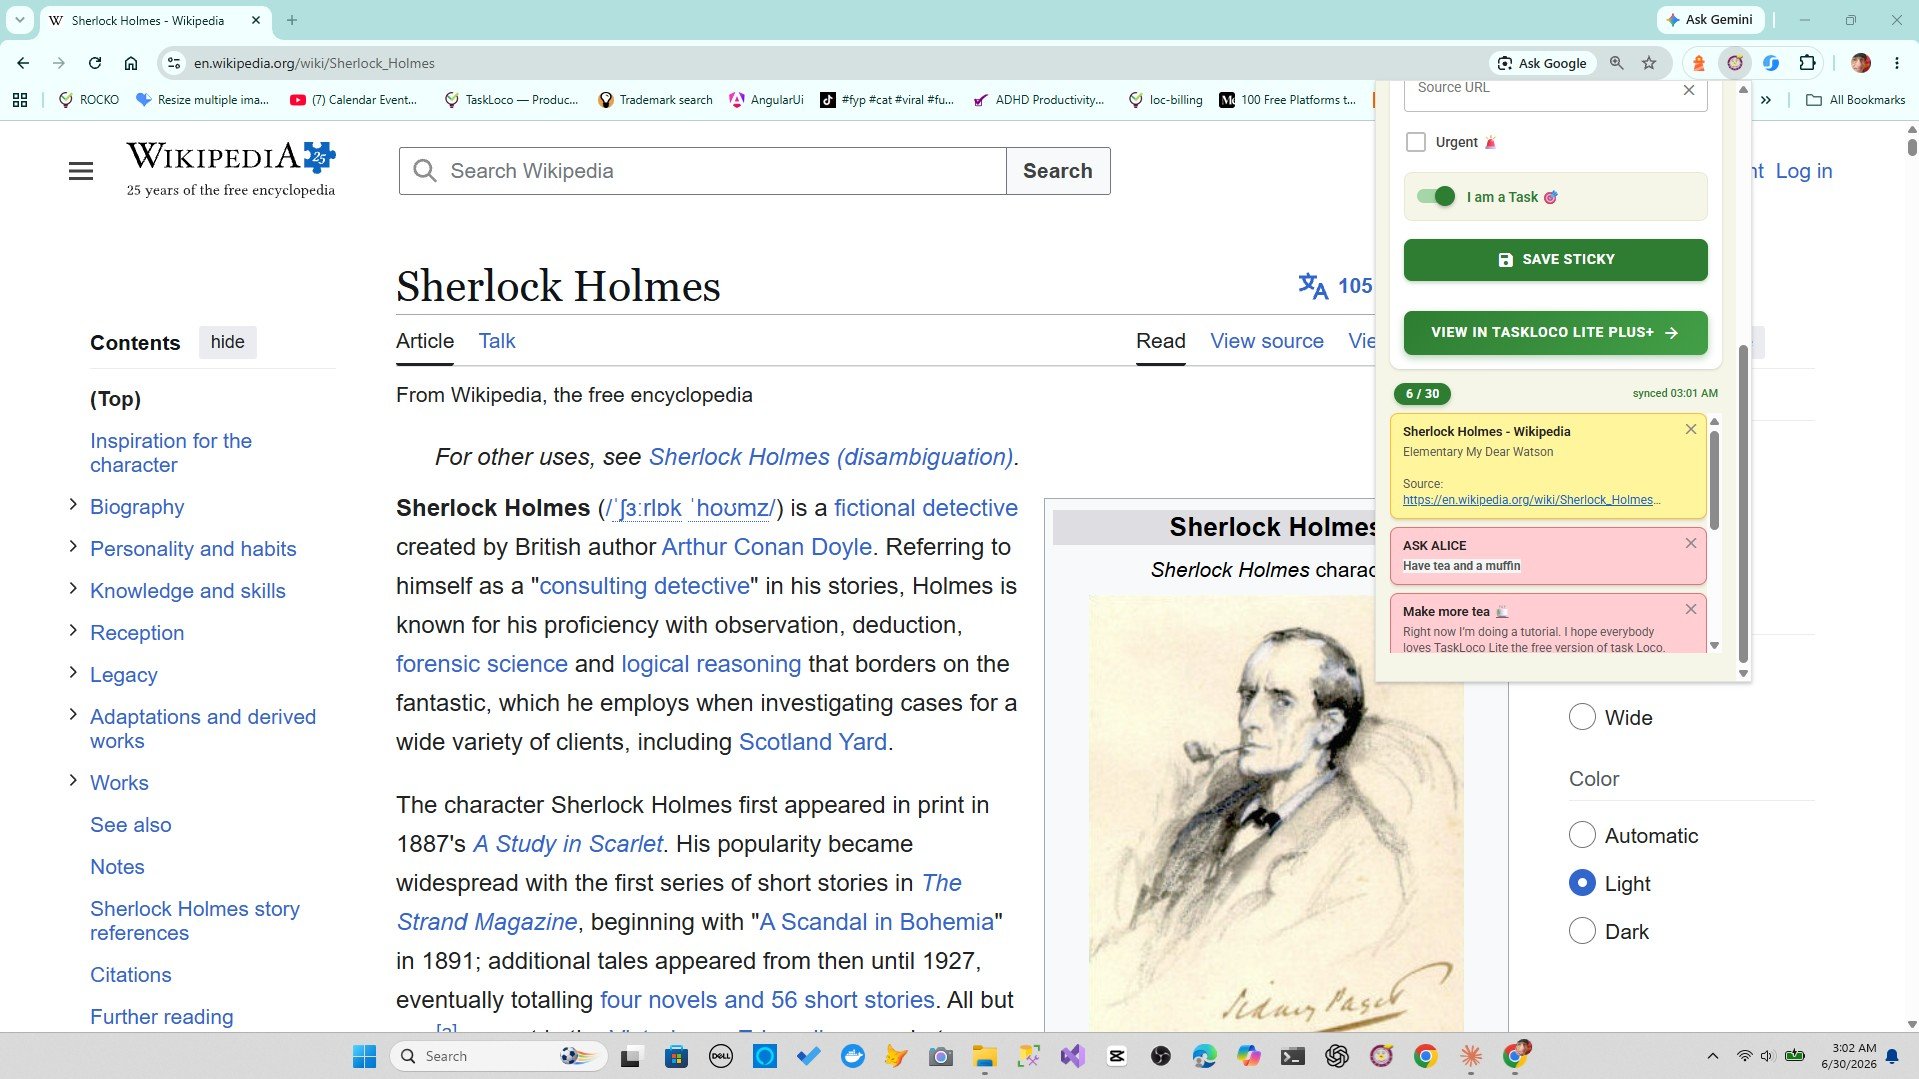
- The note is saved to your TaskLoco wall, visible alongside every other source you've clipped, arranged as sticky notes you can actually see.
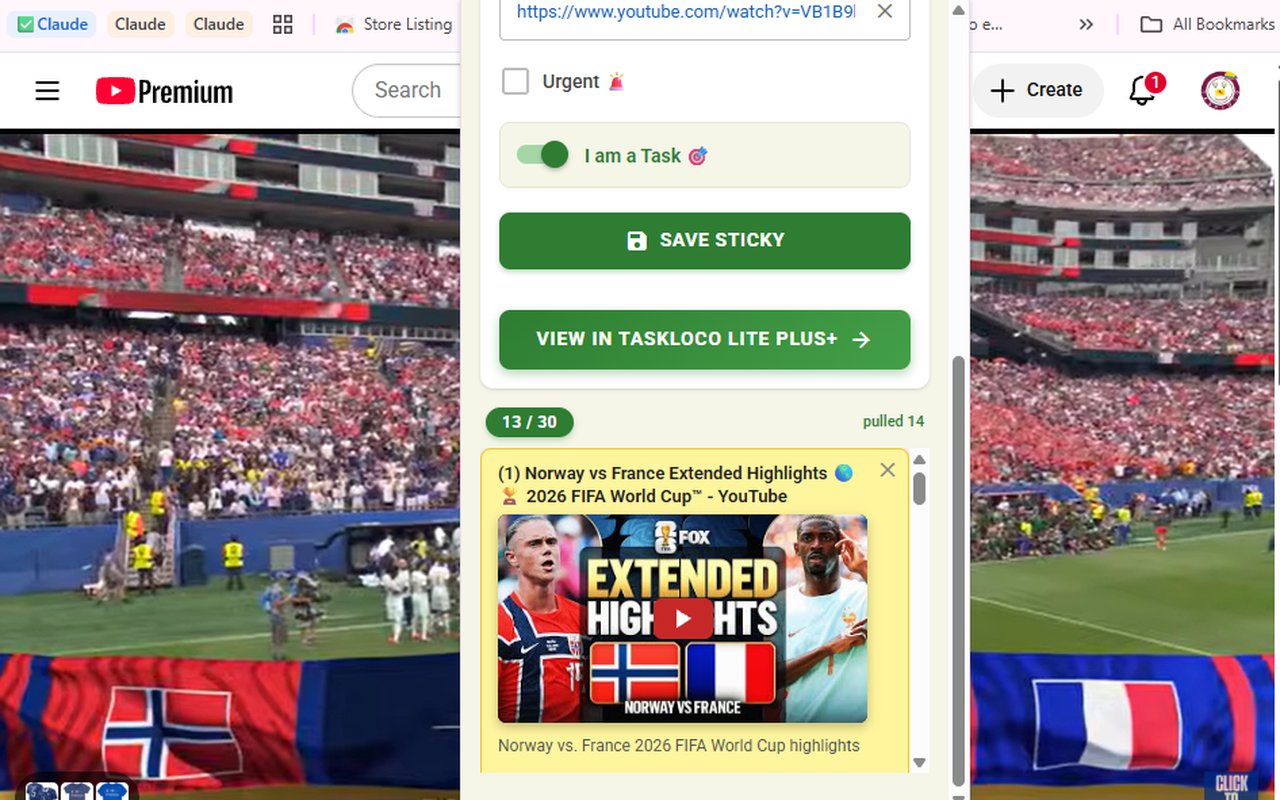
YouTube videos work the same way — if you're citing a lecture, documentary clip, or interview, click the icon on the YouTube page and the video embeds directly inside the note. It plays inside the note without opening a new tab.
Tags are searchable, so when you're ready to write your 'Counterargument' section, you search that tag and every relevant source surfaces immediately. The wall syncs to your phone and desktop through the free TaskLoco experience, so sources you clipped on your laptop are available on your phone when you're reading in transit.
This isn't about replacing your writing workflow — it's about removing the friction that causes you to leave tabs open instead of properly saving what you find. The clipping happens in the browser, where you already are.
The Sticky Note Web Clipper is free. Install it from the Chrome Web Store, sign in with Google, and every page you clip becomes a sticky note you can find later.
Your clipped notes sync to TaskLoco across Chrome, desktop, iPhone, and Android — also free to start. No credit card to begin.
Get the Free Clipper
Sticky Note Web Clipper
- Free Chrome extension
- One-click save — any page, article, or video
- Title & URL auto-filled
- Tags & search
- Free forever
Synced to TaskLoco
- Sign in free with Google
- Your wall on Chrome, desktop, iPhone, Android
- YouTube videos embed & play in notes
- Visual sticky-note wall
- Free to start
Add It to Chrome — Free
One click saves any page, article, or YouTube video as a sticky note. Title and URL auto-filled.
Add to Chrome — FreeSee TaskLoco in Action
Frequently Asked Questions
What's the best way to organize research sources by topic?
Tag each source at the moment you save it — not retroactively. Use section-based tags (e.g., 'Background', 'Evidence-for', 'Counterargument') rather than source-type tags. The Sticky Note Web Clipper lets you add tags immediately after a one-click save, so the whole process takes under five seconds per source.
How do I save webpages for research without losing them?
Never rely on open tabs — they disappear with a crash, a restart, or a misclick. Save each page the moment you find it. Options range from a plain text file with pasted URLs, to a Google Doc, to browser bookmarks. For speed with visual organization, the free Sticky Note Web Clipper saves the current tab in one click with the title and URL auto-filled.
Can I save YouTube videos as research sources?
Yes. With the Sticky Note Web Clipper, clicking the toolbar icon on any YouTube page saves the video as a sticky note — and the video embeds and plays directly inside the note. You don't need to open a new tab to watch it again. This is useful for citing lectures, interviews, or documentary clips.
Is the Sticky Note Web Clipper free?
Yes — the extension is free. TaskLoco, where your saved notes live, also has a free tier. Install from the Chrome Web Store, sign in with Google, and start saving research sources immediately.
How many tags should I use per research source?
One primary tag and one optional secondary tag is enough for most papers. One tag for the section it belongs to (e.g., 'Methodology'), one for a subtopic if needed (e.g., 'qualitative-data'). More than two tags per source usually signals that you haven't decided where the source fits yet — decide at capture time, not later.
What's wrong with using browser bookmarks to save research pages?
Bookmarks show a title and a favicon — no notes, no context, no visual layout, and no way to filter by topic without creating a deeply nested folder structure that's tedious to maintain. They also don't tell you why you saved a page. A system that adds a tag and a note at capture time gives you far more to work with when you sit down to write.
Can I access my saved research sources on my phone?
Yes. Notes saved with the Sticky Note Web Clipper sync to TaskLoco, which is available on iPhone, Android, and desktop. Sources you clip in Chrome on your laptop are available on your phone when you're reading away from your desk.
Born in Brooklyn. Powered by AWS. Your data stays yours.
TaskLoco is available on iPhone, Android, Chrome, and every web browser.